Buckwheat – Your Garden’s New Best Friend.

We try new things in our garden each year. This year we have been experimenting with using buckwheat as a cover crop. It’s super cool because it chokes out weeds, adds nitrogen back to the soil, is quick to bloom (so loved by pollinators), self seeding, and creates the perfect habitat for beneficial and pest insects — you can also harvest it and make your very own buckwheat flour. You might even get froggy and make some tasty buckwheat pancakes on a rainy Saturday morning which happens to be my Papa’s favorite.

IMG_0002
If you’re struggling with pesky insects like aphids or caterpillars, planting some buckwheat nearby or amongst your garden might be a life saver. Buckwheat attracts a number of beneficial insects like hover flies which feed on aphids. The female hover fly likes to lay her eggs close to an aphid infestation. After hatching, which only takes a few days, the larvae starts feeding on the aphids immediately. Now, it would be hard for us to know when this is all going down but say we did, we would be able to tell a difference in aphid population in just a few days. Resulting in happier and healthier plants.

DSC_0598

Staggering your planting in almost any crop is smart (in my opinion). Especially if you’re needing continuous flow and to stay out of the grocery store. I mean who wants 20 heads of lettuce ready for harvest all at once (unless you’re running a CSA or something like that)? And for that matter we want a continuous nectar source for our honey bees and for our hover flies. If we provide them with the optimum habitat then they will stay. Its a win-win, for them, us, and our garden. So I guess a win-win-win.

IMG_0001

When planning our apiary we decided buckwheat/wildflowers would be the perfect pair. At first we planted a 20’x50′ plot of buckwheat. A few weeks later, we sowed a 50’x 100′ plot. We also planted buckwheat around a lot of our trees, around our brambles, blueberry rows, and even around and in-between our potato rows. So far, although early, everything is looking good. It’s hard to give an accurate comparison from last year to this year with only having my memory to compare. I try to document things but lets face it… that’s really hard to do. Sometimes it happens and sometimes it doesn’t. BUT, it’s really smart to keep a garden journal and if nothing else log a garden blueprint. So you know what was planted where and what worked and didn’t for the next planting.

And did I mention that it’s one of the more affordable seeds and that its non-gmo? Check with your local mill. We purchased a 50 lb bag for around $45. If you’re new to cover crops or haven’t given your soil a break in a while… try your hand at buckwheat. It’s an easy to grow crop that gives back to the soil, your harvest, and you.


Banana Espresso Muffins

We recently sold our vintage camper. If you’re new to my page you can read on her and her remodel here. To be completely honest with you.. my heart is kinda broken. I really really loved that camper and wasn’t ready to say good bye to her. I really wanted to work on her a little longer. We went camping a few weeks ago and talked about putting her up for sale. By the time we got home I thought I would post her on good ol craigslist. We had 6 people interested in 24 hours and she was sold in 48 hours. It happened so fast my feelings didn’t have the chance to get in the way. It was happening. And we doubled our money on our investment after owning her for 2 years. And she was gone. Just like that.
11705347_10153505705307806_7073284331330879548_n.jpg

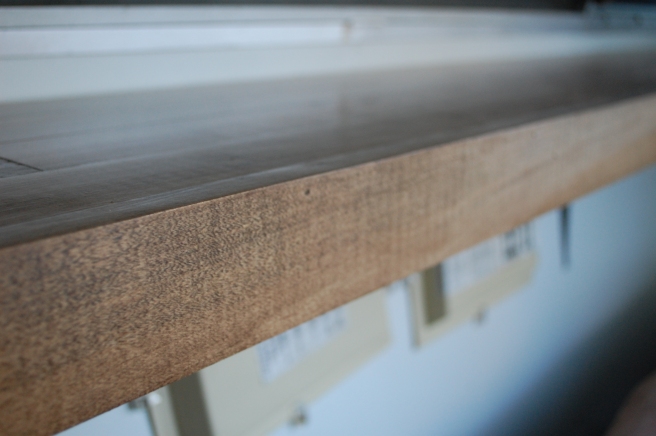
So we bought a fifth wheel. Daniel has wanted one for years. It tows great and fits our family perfectly and I can see where it will accommodate us better especially on long trips (we go on these often). No more eating a meal indian style on our bed like college kids. We actually have a dining room and chairs… and our own bedroom. To me the majority of campers have such ugly upholstery prints. Why?? Really, is it that hard to find some decent non-floral pattern? And soft material? I seriously think our 1975 Avion had better looking original upholstery than these modern day campers. But maybe thats because I’m an old soul and love anything vintage. Truth is… my heart belongs with a vintage camper. I plan on remodeling this camper in the Fall. Maybe a little paint, butcher block counters, new floor (toss the nasty carpet), different curtains, upgrade the tv and such. I’m thinking maybe a outdoorsy theme… beige (or white), burlap, and flannel of some sort. Rereading that sounds so tacky but I’m sure I can pull it together.

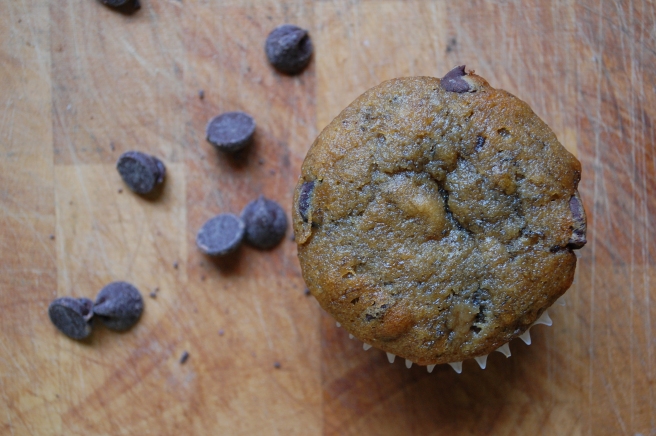
Okay, I’m sure you’re bored with my camper talk. Muffins. These seriously are so good they have a texture more of a dense soft (this made me giggle) cupcake. Idk they are amazing. And talk about a crowd pleaser! People KEEP talking about these! I think the first time I made these they were gone in two days. Yikes!! They aren’t gluten free. Not yet at least, but I am working on it.

Banana Espresso Muffins

Preheat oven to 350 F

Ingredients:

2 ripe bananas, mashed
1/3 cup coconut oil, melted
3/4 cup sugar
1 farm raised egg
2 tablespoons brewed espresso
1 teaspoon baking soda
Dash of salt
1 1/2 cup all purpose flour
1 cup chocolate chips

In a large bowl, mix ingredients together in the order they are listed. This recipe makes 12 standard muffins. Distribute the batter evenly amongst the 12 lined muffin tin. Bake for 20-25 minutes or until center is firm. Be careful not to over bake.

So simple. Enjoy this delicious treat!

DSC_0655.JPG

I’m Not a Supermom

First off, Happy Father’s Day! I hope everyone made the father in their life feel loved and happy today. I personally think these “days” are kinda silly, because we should make our loved ones feel loved and special everyday. Although, its fun to acknowledge each person on special days like today. And it makes for a good reason to grill out if you didn’t have one already!

unnamed

As I’ve mentioned before, we have tried a lot of “diets” and at this point I totally despise that word. I catch myself seeing/reading it on social media and roll my eyes and keep scrolling. Guilty. I haven’t done a lot of research on diets, working out, and all of that. But I do know what works for us and we don’t do anything special. We simply try to eat a ton of vegetables, some fruit, probiotics daily, and limit animal protein. I think its simple.

unnamed

When we decided I was going to stay at home with our daughter and quit my job working at a pediatricians office. I was beyond stoked. I thought I was going to have it easy. Seriously, I couldn’t wait. I quickly realized how chaotic and stressful staying at home could and was going to be for me. It’s in my nature to get stressed out easily. With a baby (now two, a two year old and a 6 month old–all in 2.5 years), my husband is off working hard for us. For me. For me to stay at home. I really felt (especially in the beginning) that I needed to have the house clean: laundry up, dishes clean and put away, floors swept and mopped, and with a home cooked meal waiting on him. Because I was at home. THATS CRAZY!

I heard something a while back that really hit home with me. The laundry piles (clean or dirty) show that your kids are clothed, dirty dishes show that your kids are fed, toys in the floor aka landmines (as we like to call them) show that your child gets to play, all of these things show life. Life in your home. If you’re house isn’t clean SO WHAT. It’s not important. You have tomorrow. I can’t tell you how many nights after the kids were in bed that I sat on the couch and ran through my day in my head. Did I give enough attention? Did I praise her enough? Was I too harsh on her? Did I teach her anything? Did we read enough books? Was she happy today?

I remember as a child my mom would always ask me before bed, “What was your favorite part of the day?”. I’m sure I came up with some crazy answers but that is something I try to always ask my little girl before she goes to bed. And normally she responds, “Have fun today”. She may not have it yet but eventually. I’m not sure when my switch flipped but I soon started gauging my day as a good day by how much I made them laugh. Making my kids laugh show me that they’re happy. They’re having fun. And I don’t want her having to think and scrounge around trying to figure out what her favorite part of the day was. The house can wait. I’m not a super-mom regardless of how society makes you feel like you should be. I’ll be the first to admit I’m far from that.

IMG_2246

So, if you’re a parent struggling with any of these same issues. You’re doing amazing. Parenting isn’t easy, but it’s the most rewarding. Push work to the side to spend a little extra time with them and watch their eyes glow. They love us so much. Trust us. Want us and our attention. They seek our comfort. They want to be held by us not someone else, us. And they deserve everything that we have. They are our humans that we prayed for. Asked God for. Asked God to protect and to put his hand on.

With our busy life I seek simple meals. That at times take a little longer to make because I have two littles running around. But tonights meal was out of this world. I use a lot of Juli Bauer’s recipes mainly for their simplicity and I tend to have a lot of her ingredients on hand and not one has failed me! But tonight I made her Honey Mustard Chicken Skewers and they were so simple and nothing short of amazing. We paired them with a veggie melody that we harvested from our garden. Potatoes, patty pan squash, yellow straight neck squash, and onions. I marinated them in Allegro marinade (found at Wal-Mart or on Amazon) for about an hour. Grilled until tender.

So amazing and yet so simple and wholesome for our busy life.

unnamed


Roasted Butternut Squash and Quinoa Salad with Pickled Shallot

We are in full gardening mode here at the Hardison Homestead. Every year it seems like we are changing our garden around. We have planted in raised beds made of railroad ties for a few years now. Last year we had a super dry garden season with extremely high heat. The only success we had came from our raised beds.

Although, railroad ties are made with creosote. The particular ones we purchased were extremely old and didn’t have a smell and to be honest with you creosote never even crossed my mind in regards to contaminating our soil.

Creosote is used for preserving wood through a high temperature/pressure/chemical process. Forcing creosote [known as a fungicide, insecticide, sporicide, miticide and known to be a carcinogen to humans] into the timber so it will last for years. Most common uses: [of course] railroads, light poles, fence posts… but certainly should be reconsidered for your raised beds.

At the time, we went that route due to time and cost. We first made 6 beds then rearranged them in the front of the house as just 3 beds. Each bed was finished after 4 ties and 3 cinder blocks- done deal. Thankfully–so so thankful– my husband started doing some reading after working in the beds some earlier this year and we decided to get rid of the railroad tie idea. This added a lot of work to our plate!

With a new mind set, we decided to use all untreated wood. We have read where we should be able to get about 5 years out of it. We struggled with this and wondered if the few years would make it worth the investment. What the heck, we went with it and decided we will replace them as needed and hope they last longer.

Our front garden is now turning into what we call our “garden nook”. We will be working all day Saturday in our nook and hopefully I will have pictures to post. Maybe this will stir up some creative ideas for you and your family for your garden and homestead.

While things couldn’t possibly get any more busy we decided to become beekeepers!! We couldn’t be anymore excited. Like this is a DREAM! This is totally a different post [so stay tuned].

You’re probably like, “What the heck, I only clicked on this because this sounded like a killer recipe. What in the world is she talking about over here??”. So sorry I’m rambling. I made this yesterday and after one bite my husband raved about it. Its super simple and a crowd pleaser.

Roasted Butternut Squash and Quinoa Salad with Pickled Shallot

DSC_0465

Ingredients:
1 1/2 cups quinoa, cooked and cooled
1 butternut squash, cubed
3 cups kale, rinsed and chopped
1 cucumber, cubed
1 can white kidney beans, drained and rinsed
Thyme
salt
black pepper
evoo
hemp hearts, for garnishing or around 2 tablespoons
chia seeds, for garnishing or around 1 teaspoon

Pickled Shallot
1 shallot,thinly sliced
1/2 cup raw unfiltered apple cider vinegar
1/2 cup water

Dressing
1/2 cup evoo
1/4 cup balsamic vinegar
1 clove garlic, finely chopped
2 Tablespoons dijon mustard
pinch of salt
dash of pepper
Instructions:

Preheat oven to 400*F.

While the oven is preheating, combine the apple cider vinegar and water along with sliced shallot in a mason jar. Put a lid on it and place it in the refrigerator to start pickling. You can leave them to marry for 30 minutes or even 24 hours. Its up to you and depends on how much time you have.

**FYI pickled onions last for several weeks in the fridge. We used to keep them on hand and typically vinegar to water will be a 1:1 ratio. Feel free to experiment with different vinegars and herbs!**

Place [rinsed and chopped] kale in a bowl and set to the side.

For the dressing, place all ingredients in a pint mason jar, cap it, and shake the heck out of it until its beautiful and creamy. Drizzle a few tablespoons over kale and massage until its fully coated. Place both in the refrigerator to rest.

Place butternut squash on a baking sheet [I used my silicone baking mat so they wouldn’t stick to the pan], drizzle evoo over squash and toss to fully coat. Sprinkle with thyme [amount of your choice. I used around 5 stems] and a pinch of salt. Bake for 12-15 mins or until tender. Remove from oven to cool.

While your squash is cooking is a good time to cube your cucumber and drain/rinse your beans if you haven’t done so already.

You can assemble your salad how you’d like. Layer it, mix it all together or even make it look like a pretty protein bowl.. thats essentially what this is anyways.

DSC_0466

**I put around 1/2 cup quinoa in the bottom of my bowl, with a few spoon fulls of kidney beans, a handful of cucumbers, a hefty pinch of marinated kale [its now more tender], butternut squash, pickled shallots, hemp hearts and sprinkled with chia seeds. Then drizzled with the creamy balsamic dressing.**

DSC_0472

This is a simple recipe and is super versatile that can be adjusted to your likes and dietary needs. The majority of these ingredients can be grown on your homestead allowing you to make this at a fraction of the typical cost. I am so excited to grow quinoa and butternut squash [two newbies for us!] this year!

I hope you try it and enjoy!

Hemp Heart and Carob Muffins

Over the course of the seven years that my husband and I have been together we have eaten pretty well. Probably above average, mainly because my parents eat a very strict diet due to undeserving ailments. There has always been room to “clean up our diet” regardless of how well we thought we were eating. So we tried.. Mediterranean, paleo, gluten-free, vegetarian… all in all, I hate diets and I don’t want one. Bye Felicia – I want to have a healthy lifestyle. Period. Whether it be being active outside or fueling my body with micronutrients. I want that. I don’t want to have to think “am I allowed to eat that? What does the book say??”. I want to be able to sit firmly in my clean diet to where the bull isn’t desired or even craved.

Each time we would start a diet. We were all in and with such a big change I found that we couldn’t hold on to it. We would fall off especially on the weekends succumbing to the fast food fillers and sugar- the dietary crack. Which made every change and meal that we ate throughout the week completely redundant.

We watched some documentary on Netflix a little bit ago taking about the benefits of a plant-based diet and everything made so much sense. I started meal planning more vegetarian meals with a few meals containing animal protein – no big deal. I typically buy 1 lb of turkey and fish [always checking that it is wild caught in the USA] of some sort for our weeks meals.  Just yesterday I read in Mens Journal [probably the best magazine ever] how red meat consumption raises the risk of developing diverticulitis- each serving by a whopping 18%. You can read the whole article on page 49 of the April 2017 issue. It seems like there is always some new study showing more raised risks with animal protein consumption. Hmm weird.

With all of that aside, I love meat. Would I ever turn down a beautifully charred steak? No probably not. But over the past 3 weeks we have eaten minimal animal protein and have focused on eating more vegetables- wide range of colors [I’ve aways heard to eat a variety of colors] and always making a point to grab a new never tried veggie which forces myself to try a new recipe. I always shop at Trader Joe’s. You seriously can’t beat their produce prices unless you’re growing it yourself. Not to mention the quality is so much higher [in my opinion] than other supermarkets.

By cutting out gluten [we very rarely eat it], refined sugar, and eating more vegetables my husband and I over the course of 3 weeks now have lost a combined weight of 25 lbs. Which is amazing! We are not on some crazy “diet” that you have to buy into or eat a crazy meal plan with fancy protein shakes or pre workout drinks. I fix simple paleo based meals [often leaving out the meat] that are delicious and crazy easy. More than likely you have everything in your fridge already. And also let me say that we aren’t on a crazy workout regime. I have a steady yoga practice and my husband does body weight circuits. Nothing crazy.

This is probably the most dedicated we have been to a regime and in fact I would like to call it a lifestyle. Can you call it that after just 3 weeks? Its hard not to be dedicated with such quick results and when you and your taste buds aren’t starving.

With all of this gibberish behind us let’s make some dope muffins.

Hemp Heart and Carob Muffins


DSC_0364.JPG

Ingredients:

1/2 cup coconut flour

1/3 cup hemp hearts

1/4 cup chia seeds

3/4 cup coconut oil, melted

1/4 cup coconut milk, full fat if you have it
 if not no biggie

6 Tablespoons carob powder

1/4 cup coconut sugar or honey

6 eggs, whisked – farm raised please

1 teaspoon vanilla

1 teaspoon lemon juice

1/2 teaspoon baking soda

pinch of salt

1/4 cup walnuts, or nut of your choice or carob chips – a little extra to garnish if you choose

Instructions:

Preheat oven to 350 F

Line muffin pan

Please pay attention because this is where it gets tricky.

Mix all ingredients together. Once combined spoon into lined muffin pan. This recipe makes 12 muffins. So distribute batter evenly amongst the 12.

Bake for 20-25 minutes.

These are so dang good and you won’t feel bad about eating them! Happy munching!

DSC_0344.JPG

Pickle Me Beet

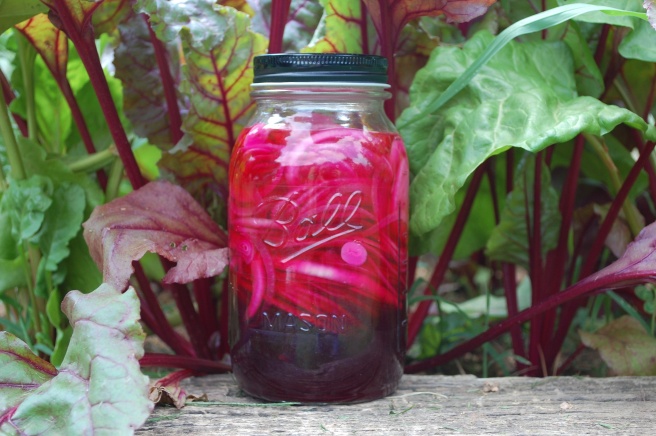
Beets. Omg. I have loved pickled beets since I was a wee little girl. The earthy taste along with the tanginess and how about that rich bold color?! Could easily be one of my favorite veggies.

I typically make my pickled beets to eat fresh. I never make enough to can. I just leave them in the fridge and eat as a snack or for dinner. They dont last long!

Before we harvested our beets from the garden I would go to Trader Joe’s and pick up a 1lb bag of organic beets for like $1.98. I don’t know if that’s a good price in comparison to buying in bulk but you can’t beat that for a healthy snack.

For me, 1lb will make 1 1/2 quarts. It’s so quick and easy.


Pickled Beets (refrigerator)

1lb organic beets

2 cups apple cider vinegar (you’re welcome to use white vinegar but the taste may be slightly different)

2 cups water

1 cup sugar

2 teaspoons salt

DSC_0057.JPG

》》Prepping your beets: If your beets come with the stems and leaves still intact then cut the stems about an inch or two above the root. NOTE: If you cut into your root prior to boiling, your beet will bleed out and you will lose the majority of your color.

Next wash thoroughly. And thoroughly again. You may even want to get a rag and scrub that dirt away. There’s nothing worse than a gritty beet.

》》Boiling your beets: Set your stovetop on high. Place your washed beets into a large pot completely submerged in water. Place them on your stovetop and boil until tender.

Once they’re tender, remove from heat and let cool. (I use tongs and move the beets to a cutting board to cool.)

》》Cutting your beets: First, you want to trim off the beet stems and peel your beets. They will be extremely hot so please allow time to cool.

It’s up to you how you’d like to cut them. Sliced or quartered.

Once they’re cut to your liking start dropping them into your mason jars. If you don’t have any you can buy them here or here.

》》Making your pickling solution: Over high heat, combine all ingredients and stir until the sugar has completely dissolved. NOTE: You can add more sugar if you’d like them a little sweeter. I prefer mine with a bite.

Once the sugar has dissolved use a funnel and ladle your mixture over the beets. Use an old mayo lid to twist onto the jars or a lid and ring that came with your mason jar sets and slide those puppies into the fridge.

》》They should be ready to enjoy in about 24 hours and gone within 48 😉

NOTE: If you have any brine leftover, you can store it in the fridge up to four-six weeks. I would heat it before using with your next batch.


My next post will be about utilizing your pickled beet brine to the fullest.

Here’s a hint: They are great on salads, sandwiches, wraps, pintos, hamburgers… Any ideas??

IMG_20160602_121559

DIY Hanging Flower Pot

image

So I’ve taken the plunge. It’s official. I’ve succumbed to the blogging world of affiliate programs. When I decided to start a blog I looked at it as a way to communicate with adults, have something that I can control (any regime I had premotherhood is long gone out the window!), and I had hopes of making some money in a few years.

When we decided I was going to stay at home with our sweet O I was so excited; We both were. I really didn’t think that I would miss waking up at 5:45 am and starting my day, having a “job” that drew a paycheck, or even driving to work. But I do. I don’t regret our decision. It was the best thing we’ve ever done. Although, I do wish I could contribute more financially for our family.

I was explaining how affiliate programs work to my husband and it made me think of how we all want to “shop small” or “shop local”. The fact is, we are going to buy products. Right? So why not buy through someone who you would want to support? So they could make a little money. To draw a paycheck each month. That could put some groceries on the table or even pay a bill. So here soon I will be implementing links onto my page.

There will be links directing you to Amazon where you can purchase what you may need for a project, recipe, or a book even to help you get started with your new project. Although, most of you already knew everything I just said but for those who didn’t there you go! 🙂

image

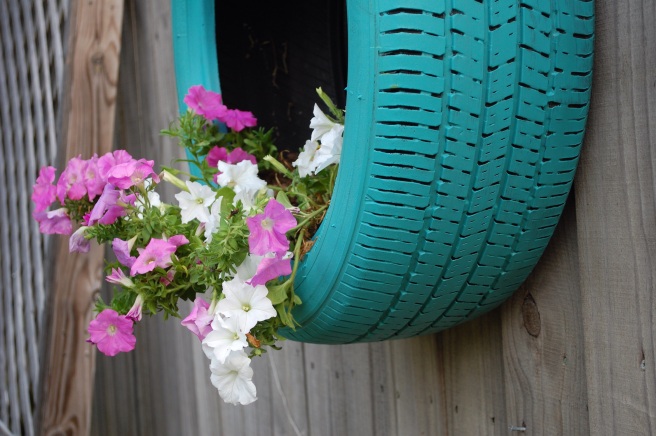
DIY HANGING FLOWER BASKET. Omg. Whaaat.

image

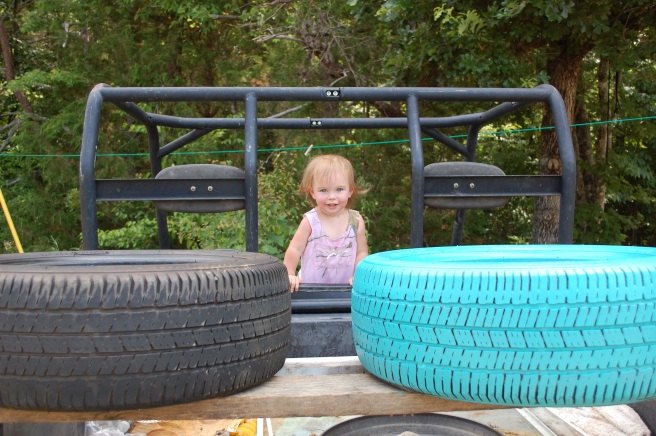
This is a perfect way to up cycle and recycle those old tires that you have lying around. They’re adorable, versatile I mean what more could you ask for?? For them to make you money? Heck, you could probably sell them even.

I used tires to plant zucchini in last year and they did great. But through the off-season they grew to become annoying to mow and weed eat around. So we will give them a makeover and get them off the ground!

I have been hoarding this beautiful teal paint by Valspar that I’ve been dying to use but haven’t had the perfect project to do so. Until now.

Blue Hawk offers these J style hooks for under $2 a piece. This certain kind calls for 2 screws each and thanks to my husband I had those on hand.

image

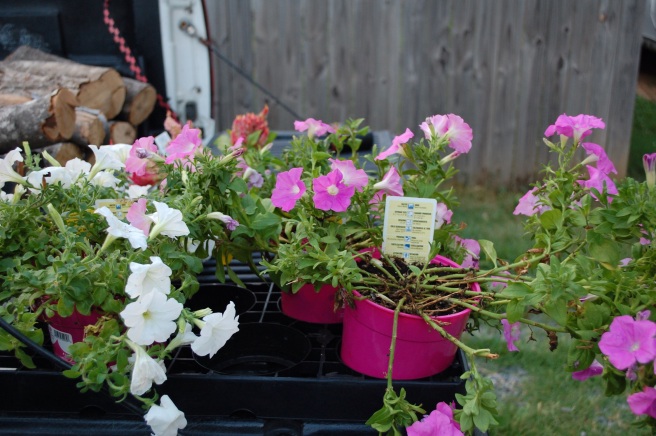
We had compost so I didn’t need to purchase potting soil. So all that was left were the flowers. I wanted something to drape down and out of the tire and to my luck petunias were on sale for $1 at Lowes. Perfect!

image

So to complete this project I needed an hour and $10. That’s my kind of project!

You can transform your new baskets into a haven for your flowers and their pollinators, a herb garden, a new home for your cukes (huge space saver btw), and even a mesculin lettuce bed. The list could go on and on. I’m getting excited thinking of everything they could be used for.

image.jpg

》》First, you will want to paint your tires and allow time to dry. If you’re dealing with 90 degree heat like we are in NC. It shouldn’t take long.

》》Drill a few holes through the bottom of your tires before you plant to ensure your plants a way to drain. Tires hold a lot of water. (You may need a drill bit for this part. If you simply use a screw, once you back it out of the tire the hole will close up. Using a drill bit will allow you to take more area out to make a good hole.)

》》Figure out where you’d like to hang them and attach your hook(s). Measure the same distance from the top of the fence to the top of your hook for both hooks to ensure they’re even. (Our baskets look uneven because our fence runs with the curvature of the earth but they’re the same distance from the top and that’s what you want.)

》》Get your plants comfy in their new home. Loosen the root system so they can grow more freely. Then fill the space around them with dirt or potting soil.

》》Step back and admire your new beauties! (If you don’t want to hang them, no problem lay them on the ground for a beautiful flower or vegetable bed.)


image.jpg


Oh, kale yea

Kale. Your gardens gold. It’s a good day when we are harvesting kale. Possibly the most versatile leafy green ever (debatable I’m sure). From smoothies to soups, kale is the most flavorful and hearty green to accompany any dish in my book. I started this post to write about my husbands favorite garden snack, kale chips, but as I’m thinking there are so many recipes for kale that shouldn’t go unnoticed. I make this killer wilted kale salad with cranberries, nuts, and feta with a balsamic dressing. OMG. Or we could even talk about my kale and lentil soup. Ah. What about kale stuffed chicken with gobs of cheese? It’s 7:48 am and I could put a hurtin’ on a savory dish right about now.

DSC_0162

The green garden jewel stands rich in vitamins and antioxidants. And it just gets sweeter as you’re cutting it from your own garden. You know how it’s fed, handled, and NOT treated with things that you cannot pronounce.

This year we focused on adding raised beds into our garden along with our regular garden. This allowed a more manageable growing environment for me and our plants compared to our field garden. We used a combo of composted manure, field soil, organic matter (leaves and such), and sand from our creek bottoms to fill the beds. Organic matter and sand allows the soil to stay loose making a safe haven for root crops and the manure showers all with the perfect amount of lovin.


Baked Kale Chips

Ingredients:

Fresh garden kale leaves – washed and dried

Olive oil

Sea salt

Optional:

Parmesean  cheese


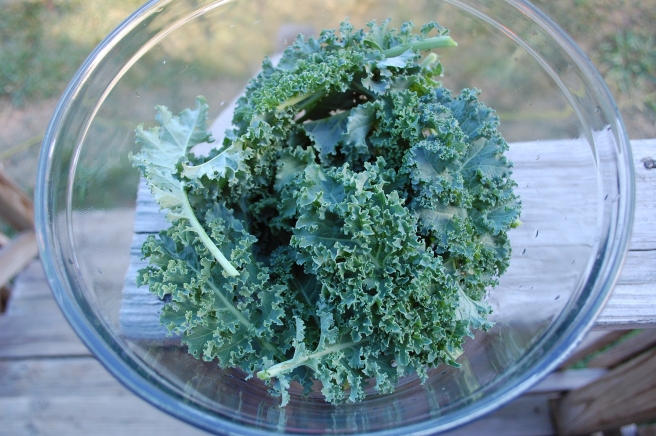
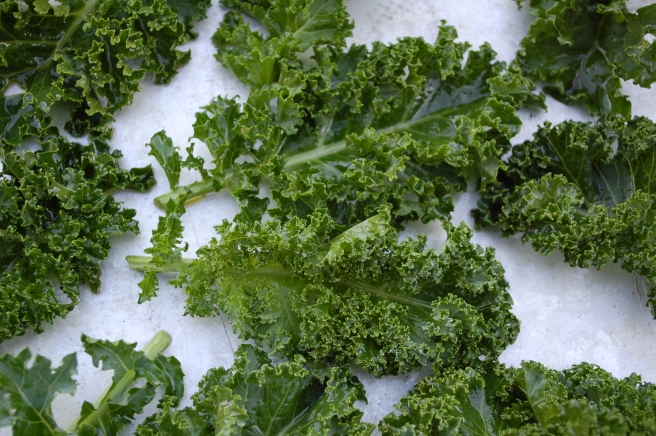
Once you have washed and dried your kale leaves, spread them onto a baking sheet. Drizzle with olive oil and give them a toss. Coating them thoroughly. Then put them in your oven that’s set for 350°F for 10-15 mins or until the edges are darkened – but not burnt! After they’re resting from their oven loven sprinkle with sea salt and parm if you like – cayenne even and snack away!

Even the manliest of men will enjoy this veggie snack without feeling like their jumping on the kale bandwagon.

Hopefully, you have grown your own kale and can make this healthy snack with basically what you have already at home without having to retreat to the store. Try it out and try it different. Let me know what you come up with so I can give it a try!


DSC_0167.JPG

DSC_0176
Garden fresh kale chips, garden grilled potatoes, garden pickled beets, farm eggs, and balsamic chicken topped with kale, quinoa, bacon, and monterrey jack cheese. #winning


With so much love – Ash

My favorite Pumpkin Pie

2015-10-13 16.26.02

It’s pumpkin everything season right? While some may race to the nearest coffee shop for a pumpkin spice latte others will be cutting, roasting, and pureeing their own pumpkin and making REAL pumpkin pies. Crust and all.

I tell you what I’ve never seen someone order coffee quite like my mom. It was hilarious. We went to Floyd, VA last week and if you haven’t ever been you should. Such a unique town. I recommend going on a Friday evening catching a local meal (ingredients and all) at Oddfellas Cantina. Really, you couldn’t make a bad choice on what to eat. And after dinner head down the street to the Country Store for some dancing. Your first trip to Floyd definitely won’t be your last!

Anyways back to coffee… we are in this super cute coffee shop overlooking the streets of Floyd. My mom leans on the counter… and you really have to know my mom… but as she talks she’s describing what she wants with her hands. “Okay, yes… I would like (insert hand gestures) something hot… with something cold on top (more hand gestures)… with something drizzled on top (more gestures). ” With my mom still perched on the counter the lady responds, “So you want hot coffee topped with whipped cream and chocolate drizzled on top?”. Mom excitedly says, “yes!!!”. Kinda like how Will Ferrell says “yes” on Elf. I was standing behind her completely confused. I had never seen someone order coffee like that before. It. Was. Hilarious.

Anyways.. I guess you should have been there. I know she’s about in tears reading this. Haha.

Pumpkin pie. Hubba hubba.

So this is a recipe for just the pie filling. I will make another post for the crust and how to cook your pumpkin. Don’t worry I’ll link the two so you can navigate easily 🙂

DSC_0942

For the filling:

2 cups fresh homemade pumpkin puree

1 cup white sugar

1/4 cup brown sugar

3 eggs (preferably from your hen-house 🙂 )

2 Tablespoons cornstarch

1 Teaspoon vanilla

1 1/2 Teaspoons cinnamon

1/4 Teaspoon nutmeg

1/8 Teaspoon ground cloves

1/4 cup milk

Directions:

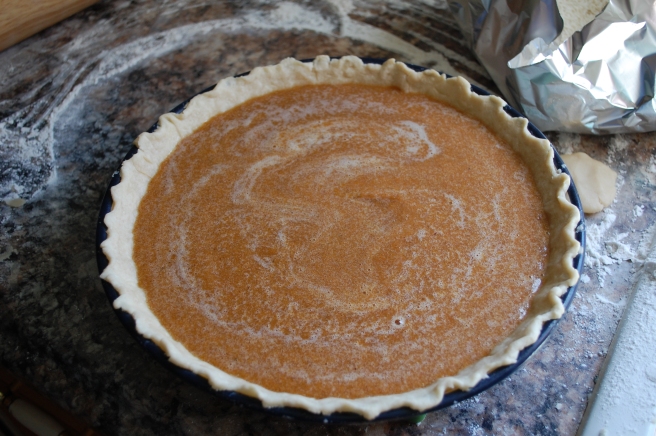
Combine the pumpkin, eggs and sugar until well combined. Then add the remaining ingredients and whisk together. My filling was pretty loose. But it cooked up perfectly.

DSC_0949

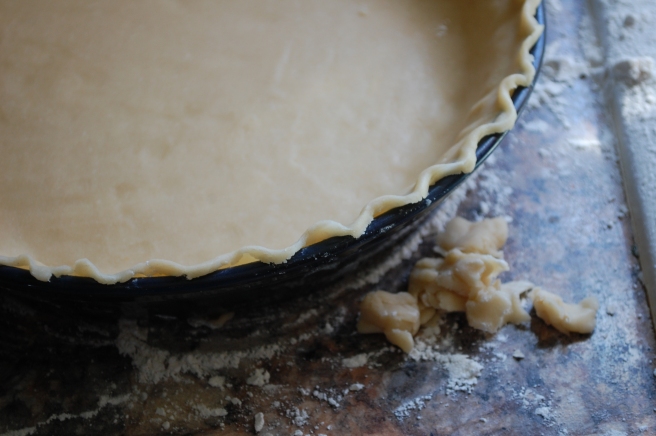
Pour into your deep pie crust. You can make your own or snag one from the store. I made an old-fashioned pie crust from lard and it was so freaking good. I’ll post the recipe soon. I just want to make sure it’s perfect for you guys 🙂

DSC_0951

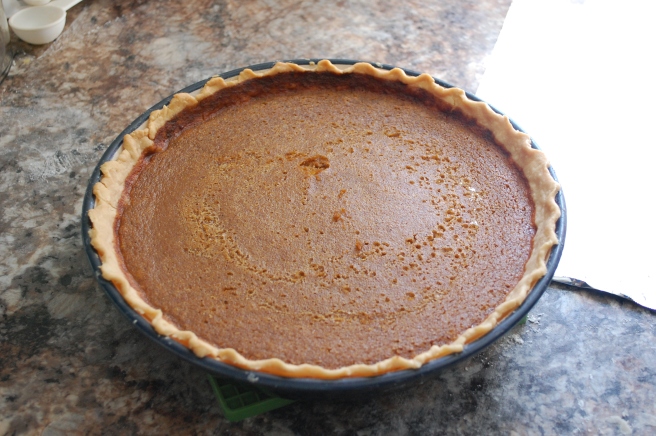
And bake at 350°F for 60 minutes. Set your timer for 25 minutes. Once it goes off set a piece of folded tin foil over your pie this way the crust doesn’t get too dark or even burnt. Be careful pulling the tinfoil off because it may snag the top of your pie like mine did 😦 Set your timer for 25 minutes again. After it goes off check the center and if it’s still not set up start checking it every 5 minutes. Mine was perfect at 60 minutes but every oven is different. All it needed was homemade whipped cream.

DSC_0956

I let mine sit and cool for 3-4 hours then I slid it into the fridge.

Viola! Perfect pumpkin pie. So so good.

Hope you enjoy!

Follow my blog to not miss a post!

P.S. try not to eat it too fast!

How to make sauerkraut

I love walking into my pantry and seeing the beautiful colors lined up screaming “pick me!”. From the green of green beans to the orange of pumpkin. Almost every veggie looks better dressed in glass. We do love our fresh summer picks. I think preserved food looks so good to us because we worked so hard nurturing it as a seedling to packing it into jars. It could be black and we’d still admire it. Okay, maybe not so much.

Does anyone else love sauerkraut immensely?

Why is it so stinking good??

Is it because it’s cabbage and cabbage is yummy? Or because it’s fermented and is so beneficial for our body? Or is it because it’s so simple to make?? All of the above!

So when we were in Virginia over the weekend visiting my parents we went to the state line produce in Cana so I could snag some mountain cabbage. I’ve been wanting to make some sauerkraut for quite some time. I haven’t made any in almost 2 years.

I always thought that pickling cabbage was sauerkraut. True sad story. Although the flavor might be similar the benefits are not. The benefits from fermented foods are incomparable to any other way of preserving. Pickling cabbage is a quick easy way to preserve the cabbage without waiting for it to ferment. Once you put fermented food through a canning process the heat kills the good bacteria that it worked so hard togrow. But if you want to enjoy your kraut year around then you have to make it shelf stable. Although it won’t have the same benefits as kraut that hasn’t been canned it will still taste amazing.

Here’s what I did…

• 2 heads of mountain cabbage

• 3 Tablespoons of sea salt (use 1.5 Tablespoons for every one head of cabbage)

• Clean mason jars

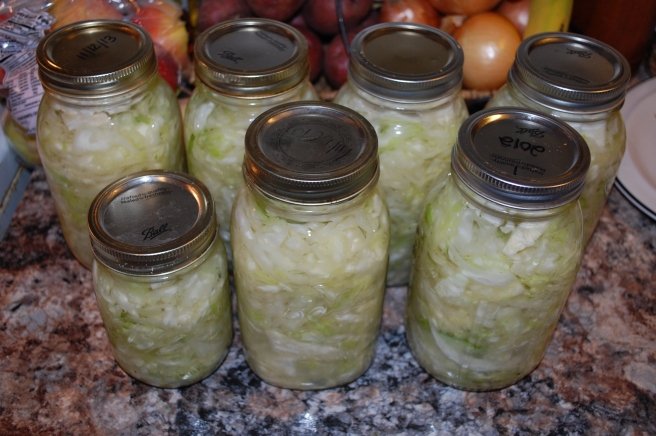
Two heads of mountain cabbage yielded 6 quarts and 1 pint of kraut. Mountain cabbage is bigger than what you tend to find in the grocery store. So if you’re using store-bought cabbage you can still use this recipe. You may not have as many quarts in the end as I did.

Any who..

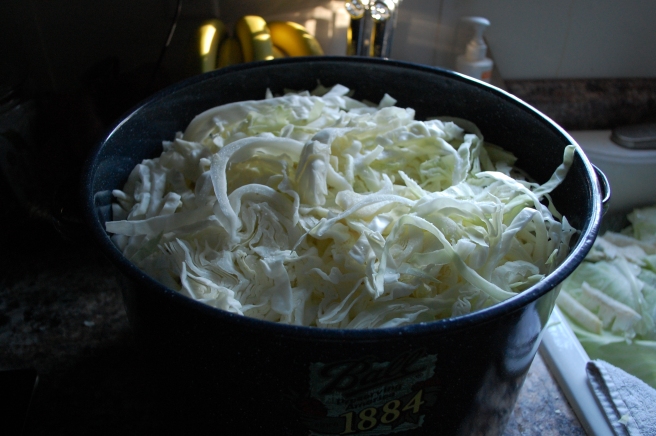
• I first quartered the cabbage and removed the core – setting the core aside for later. I then chopped them as even as possible about 1/4″ in width cutting long ways (I don’t think it matters which direction you chop them).

DSC_0960

• I don’t have a stone crock so I used my water bath canner because that’s all I had that would hold all of the cabbage. I put the first chopped cabbage into the bottom then sprinkled 1.5 Tablespoons sea salt over it. Then I repeated that step with the second head. So it was cabbage, sea salt, cabbage, sea salt. Let it rest for 10 minutes.

DSC_0964

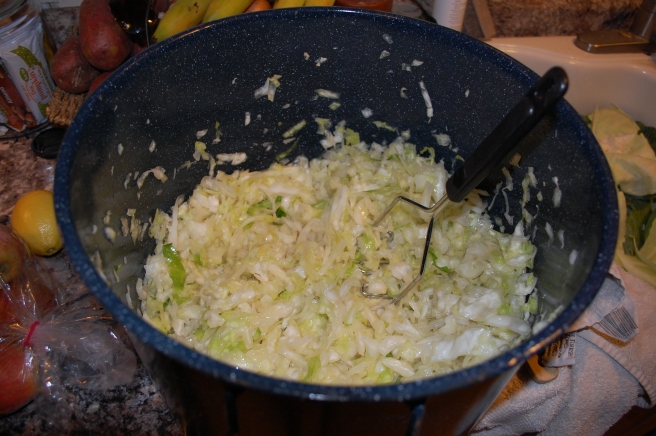
• After it rested for 10 minutes it should have started sweating.. I don’t know that that is the right term but anyways. I started working the cabbage with my hands and potato masher. Any utensil that will help you whack the crap out of it should do. Anger helps so plan to make kraut on a bad day. Lol just kidding. But really…

DSC_0969

• I worked it for about 20 minutes until the cabbage was about half the size it was in the bowl and it was kind of translucent.

• Now you’re ready for your jars. I started transferring my now wet cabbage into their new homes… packing them down after every spoonful.

• Once I had the cabbage in the jars I poured what solution that was left in the bowl over the cabbage. I didn’t have enough to cover all of the cabbage so I made a brine to finish off the rest of the jars. I brought 4 cups of water to a boil and dissolved 1 tablespoon of sea salt. Once it was dissolved I poured it over the cabbage. Then used the end of my spoon to get the air bubbles out. We’re getting close.

DSC_0971

• So we want the cabbage to stay under the brine so remember the core we set aside? Put that on top and push it down submerging the cabbage. Don’t worry if the core isn’t you probably will toss it anyways.

DSC_0970

• Tighten your lids to the jar loosely and set them on a plate or in a pan for they may “juice” which is totally normal. You may want to burp the jars by unscrewing them in a day or so. Let them sit for at least 1 week to ferment then enjoy! The longer they ferment the tangier they will be. After you’re satisfied with the ferment time then scoop off any “scum” and toss the cabbage cores and can if you wish.

DSC_0975

Congrats you made kraut!!

Look what we made for our camper 🙂

DSC_0977

DSC_0980

DSC_0982

DSC_0984

I looove it!!

Happy fermenting and happy camping!