Banana Espresso Muffins

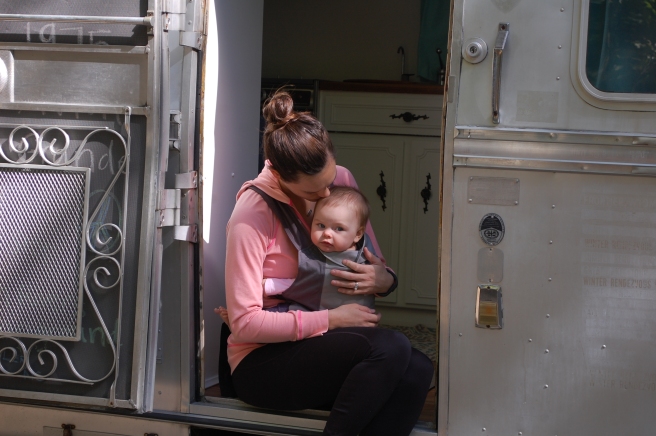
We recently sold our vintage camper. If you’re new to my page you can read on her and her remodel here. To be completely honest with you.. my heart is kinda broken. I really really loved that camper and wasn’t ready to say good bye to her. I really wanted to work on her a little longer. We went camping a few weeks ago and talked about putting her up for sale. By the time we got home I thought I would post her on good ol craigslist. We had 6 people interested in 24 hours and she was sold in 48 hours. It happened so fast my feelings didn’t have the chance to get in the way. It was happening. And we doubled our money on our investment after owning her for 2 years. And she was gone. Just like that.

11705347_10153505705307806_7073284331330879548_n.jpg

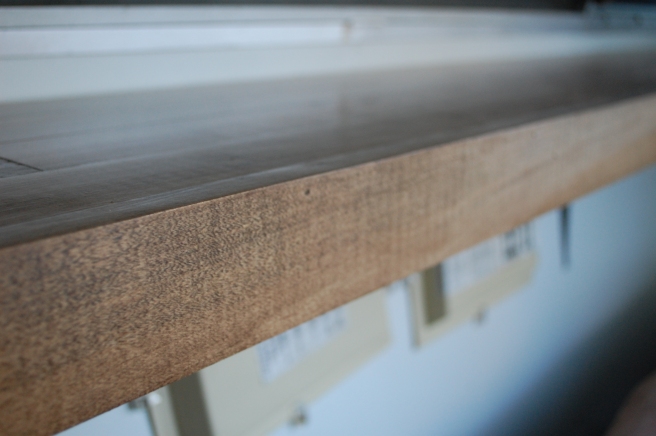
So we bought a fifth wheel. Daniel has wanted one for years. It tows great and fits our family perfectly and I can see where it will accommodate us better especially on long trips (we go on these often). No more eating a meal indian style on our bed like college kids. We actually have a dining room and chairs… and our own bedroom. To me the majority of campers have such ugly upholstery prints. Why?? Really, is it that hard to find some decent non-floral pattern? And soft material? I seriously think our 1975 Avion had better looking original upholstery than these modern day campers. But maybe thats because I’m an old soul and love anything vintage. Truth is… my heart belongs with a vintage camper. I plan on remodeling this camper in the Fall. Maybe a little paint, butcher block counters, new floor (toss the nasty carpet), different curtains, upgrade the tv and such. I’m thinking maybe a outdoorsy theme… beige (or white), burlap, and flannel of some sort. Rereading that sounds so tacky but I’m sure I can pull it together.

Okay, I’m sure you’re bored with my camper talk. Muffins. These seriously are so good they have a texture more of a dense soft (this made me giggle) cupcake. Idk they are amazing. And talk about a crowd pleaser! People KEEP talking about these! I think the first time I made these they were gone in two days. Yikes!! They aren’t gluten free. Not yet at least, but I am working on it.

Banana Espresso Muffins

Preheat oven to 350 F

Ingredients:

2 ripe bananas, mashed
1/3 cup coconut oil, melted
3/4 cup sugar
1 farm raised egg
2 tablespoons brewed espresso
1 teaspoon baking soda
Dash of salt
1 1/2 cup all purpose flour
1 cup chocolate chips

In a large bowl, mix ingredients together in the order they are listed. This recipe makes 12 standard muffins. Distribute the batter evenly amongst the 12 lined muffin tin. Bake for 20-25 minutes or until center is firm. Be careful not to over bake.

So simple. Enjoy this delicious treat!

DSC_0655.JPG

DIY Hanging Flower Pot

image

So I’ve taken the plunge. It’s official. I’ve succumbed to the blogging world of affiliate programs. When I decided to start a blog I looked at it as a way to communicate with adults, have something that I can control (any regime I had premotherhood is long gone out the window!), and I had hopes of making some money in a few years.

When we decided I was going to stay at home with our sweet O I was so excited; We both were. I really didn’t think that I would miss waking up at 5:45 am and starting my day, having a “job” that drew a paycheck, or even driving to work. But I do. I don’t regret our decision. It was the best thing we’ve ever done. Although, I do wish I could contribute more financially for our family.

I was explaining how affiliate programs work to my husband and it made me think of how we all want to “shop small” or “shop local”. The fact is, we are going to buy products. Right? So why not buy through someone who you would want to support? So they could make a little money. To draw a paycheck each month. That could put some groceries on the table or even pay a bill. So here soon I will be implementing links onto my page.

There will be links directing you to Amazon where you can purchase what you may need for a project, recipe, or a book even to help you get started with your new project. Although, most of you already knew everything I just said but for those who didn’t there you go! 🙂

image

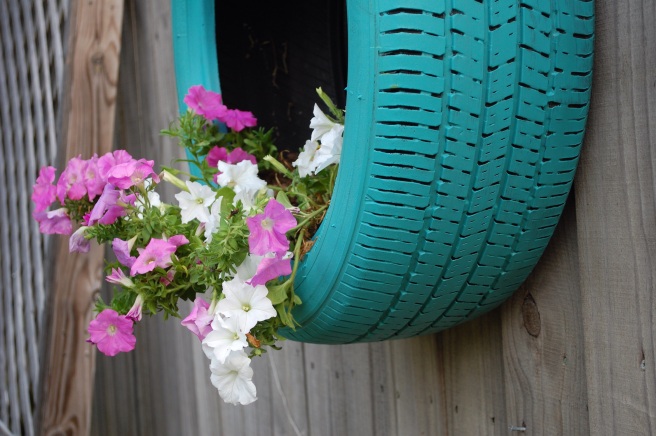
DIY HANGING FLOWER BASKET. Omg. Whaaat.

image

This is a perfect way to up cycle and recycle those old tires that you have lying around. They’re adorable, versatile I mean what more could you ask for?? For them to make you money? Heck, you could probably sell them even.

I used tires to plant zucchini in last year and they did great. But through the off-season they grew to become annoying to mow and weed eat around. So we will give them a makeover and get them off the ground!

I have been hoarding this beautiful teal paint by Valspar that I’ve been dying to use but haven’t had the perfect project to do so. Until now.

Blue Hawk offers these J style hooks for under $2 a piece. This certain kind calls for 2 screws each and thanks to my husband I had those on hand.

image

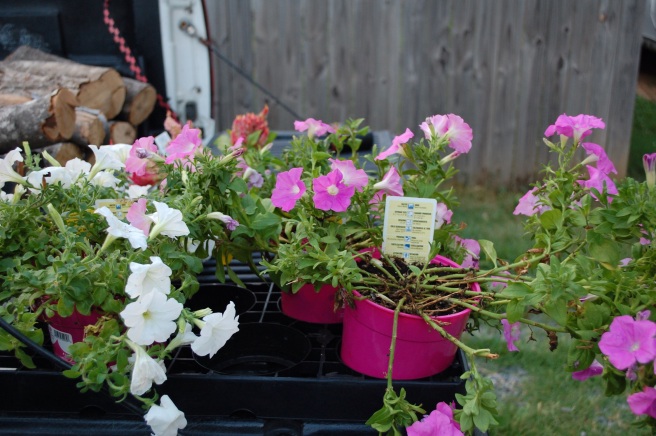
We had compost so I didn’t need to purchase potting soil. So all that was left were the flowers. I wanted something to drape down and out of the tire and to my luck petunias were on sale for $1 at Lowes. Perfect!

image

So to complete this project I needed an hour and $10. That’s my kind of project!

You can transform your new baskets into a haven for your flowers and their pollinators, a herb garden, a new home for your cukes (huge space saver btw), and even a mesculin lettuce bed. The list could go on and on. I’m getting excited thinking of everything they could be used for.

image.jpg

》》First, you will want to paint your tires and allow time to dry. If you’re dealing with 90 degree heat like we are in NC. It shouldn’t take long.

》》Drill a few holes through the bottom of your tires before you plant to ensure your plants a way to drain. Tires hold a lot of water. (You may need a drill bit for this part. If you simply use a screw, once you back it out of the tire the hole will close up. Using a drill bit will allow you to take more area out to make a good hole.)

》》Figure out where you’d like to hang them and attach your hook(s). Measure the same distance from the top of the fence to the top of your hook for both hooks to ensure they’re even. (Our baskets look uneven because our fence runs with the curvature of the earth but they’re the same distance from the top and that’s what you want.)

》》Get your plants comfy in their new home. Loosen the root system so they can grow more freely. Then fill the space around them with dirt or potting soil.

》》Step back and admire your new beauties! (If you don’t want to hang them, no problem lay them on the ground for a beautiful flower or vegetable bed.)


image.jpg


Oh, kale yea

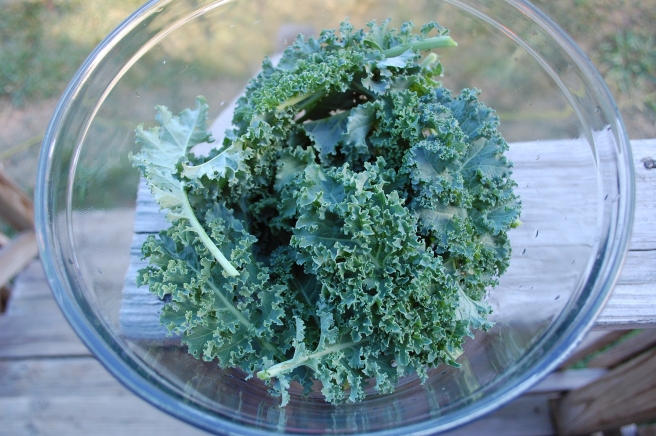
Kale. Your gardens gold. It’s a good day when we are harvesting kale. Possibly the most versatile leafy green ever (debatable I’m sure). From smoothies to soups, kale is the most flavorful and hearty green to accompany any dish in my book. I started this post to write about my husbands favorite garden snack, kale chips, but as I’m thinking there are so many recipes for kale that shouldn’t go unnoticed. I make this killer wilted kale salad with cranberries, nuts, and feta with a balsamic dressing. OMG. Or we could even talk about my kale and lentil soup. Ah. What about kale stuffed chicken with gobs of cheese? It’s 7:48 am and I could put a hurtin’ on a savory dish right about now.

DSC_0162

The green garden jewel stands rich in vitamins and antioxidants. And it just gets sweeter as you’re cutting it from your own garden. You know how it’s fed, handled, and NOT treated with things that you cannot pronounce.

This year we focused on adding raised beds into our garden along with our regular garden. This allowed a more manageable growing environment for me and our plants compared to our field garden. We used a combo of composted manure, field soil, organic matter (leaves and such), and sand from our creek bottoms to fill the beds. Organic matter and sand allows the soil to stay loose making a safe haven for root crops and the manure showers all with the perfect amount of lovin.


Baked Kale Chips

Ingredients:

Fresh garden kale leaves – washed and dried

Olive oil

Sea salt

Optional:

Parmesean  cheese


Once you have washed and dried your kale leaves, spread them onto a baking sheet. Drizzle with olive oil and give them a toss. Coating them thoroughly. Then put them in your oven that’s set for 350°F for 10-15 mins or until the edges are darkened – but not burnt! After they’re resting from their oven loven sprinkle with sea salt and parm if you like – cayenne even and snack away!

Even the manliest of men will enjoy this veggie snack without feeling like their jumping on the kale bandwagon.

Hopefully, you have grown your own kale and can make this healthy snack with basically what you have already at home without having to retreat to the store. Try it out and try it different. Let me know what you come up with so I can give it a try!


DSC_0167.JPG

DSC_0176
Garden fresh kale chips, garden grilled potatoes, garden pickled beets, farm eggs, and balsamic chicken topped with kale, quinoa, bacon, and monterrey jack cheese. #winning


With so much love – Ash

My favorite Pumpkin Pie

2015-10-13 16.26.02

It’s pumpkin everything season right? While some may race to the nearest coffee shop for a pumpkin spice latte others will be cutting, roasting, and pureeing their own pumpkin and making REAL pumpkin pies. Crust and all.

I tell you what I’ve never seen someone order coffee quite like my mom. It was hilarious. We went to Floyd, VA last week and if you haven’t ever been you should. Such a unique town. I recommend going on a Friday evening catching a local meal (ingredients and all) at Oddfellas Cantina. Really, you couldn’t make a bad choice on what to eat. And after dinner head down the street to the Country Store for some dancing. Your first trip to Floyd definitely won’t be your last!

Anyways back to coffee… we are in this super cute coffee shop overlooking the streets of Floyd. My mom leans on the counter… and you really have to know my mom… but as she talks she’s describing what she wants with her hands. “Okay, yes… I would like (insert hand gestures) something hot… with something cold on top (more hand gestures)… with something drizzled on top (more gestures). ” With my mom still perched on the counter the lady responds, “So you want hot coffee topped with whipped cream and chocolate drizzled on top?”. Mom excitedly says, “yes!!!”. Kinda like how Will Ferrell says “yes” on Elf. I was standing behind her completely confused. I had never seen someone order coffee like that before. It. Was. Hilarious.

Anyways.. I guess you should have been there. I know she’s about in tears reading this. Haha.

Pumpkin pie. Hubba hubba.

So this is a recipe for just the pie filling. I will make another post for the crust and how to cook your pumpkin. Don’t worry I’ll link the two so you can navigate easily 🙂

DSC_0942

For the filling:

2 cups fresh homemade pumpkin puree

1 cup white sugar

1/4 cup brown sugar

3 eggs (preferably from your hen-house 🙂 )

2 Tablespoons cornstarch

1 Teaspoon vanilla

1 1/2 Teaspoons cinnamon

1/4 Teaspoon nutmeg

1/8 Teaspoon ground cloves

1/4 cup milk

Directions:

Combine the pumpkin, eggs and sugar until well combined. Then add the remaining ingredients and whisk together. My filling was pretty loose. But it cooked up perfectly.

DSC_0949

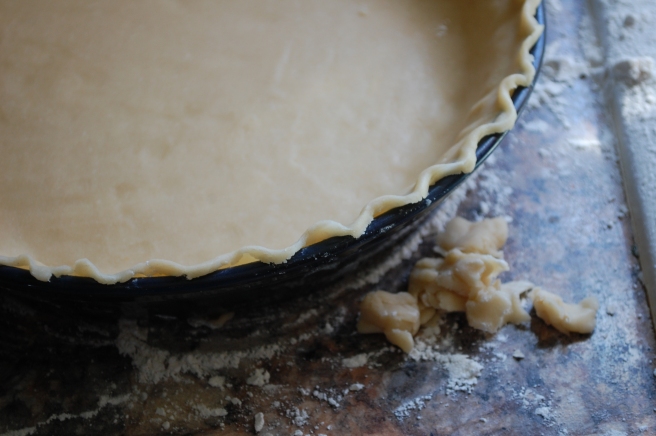
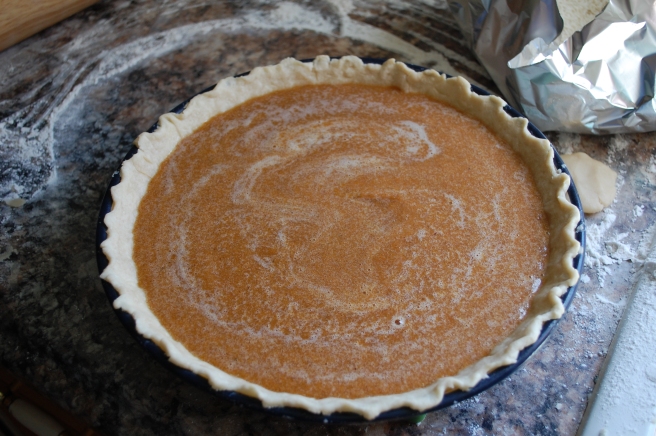
Pour into your deep pie crust. You can make your own or snag one from the store. I made an old-fashioned pie crust from lard and it was so freaking good. I’ll post the recipe soon. I just want to make sure it’s perfect for you guys 🙂

DSC_0951

And bake at 350°F for 60 minutes. Set your timer for 25 minutes. Once it goes off set a piece of folded tin foil over your pie this way the crust doesn’t get too dark or even burnt. Be careful pulling the tinfoil off because it may snag the top of your pie like mine did 😦 Set your timer for 25 minutes again. After it goes off check the center and if it’s still not set up start checking it every 5 minutes. Mine was perfect at 60 minutes but every oven is different. All it needed was homemade whipped cream.

DSC_0956

I let mine sit and cool for 3-4 hours then I slid it into the fridge.

Viola! Perfect pumpkin pie. So so good.

Hope you enjoy!

Follow my blog to not miss a post!

P.S. try not to eat it too fast!

How to make sauerkraut

I love walking into my pantry and seeing the beautiful colors lined up screaming “pick me!”. From the green of green beans to the orange of pumpkin. Almost every veggie looks better dressed in glass. We do love our fresh summer picks. I think preserved food looks so good to us because we worked so hard nurturing it as a seedling to packing it into jars. It could be black and we’d still admire it. Okay, maybe not so much.

Does anyone else love sauerkraut immensely?

Why is it so stinking good??

Is it because it’s cabbage and cabbage is yummy? Or because it’s fermented and is so beneficial for our body? Or is it because it’s so simple to make?? All of the above!

So when we were in Virginia over the weekend visiting my parents we went to the state line produce in Cana so I could snag some mountain cabbage. I’ve been wanting to make some sauerkraut for quite some time. I haven’t made any in almost 2 years.

I always thought that pickling cabbage was sauerkraut. True sad story. Although the flavor might be similar the benefits are not. The benefits from fermented foods are incomparable to any other way of preserving. Pickling cabbage is a quick easy way to preserve the cabbage without waiting for it to ferment. Once you put fermented food through a canning process the heat kills the good bacteria that it worked so hard togrow. But if you want to enjoy your kraut year around then you have to make it shelf stable. Although it won’t have the same benefits as kraut that hasn’t been canned it will still taste amazing.

Here’s what I did…

• 2 heads of mountain cabbage

• 3 Tablespoons of sea salt (use 1.5 Tablespoons for every one head of cabbage)

• Clean mason jars

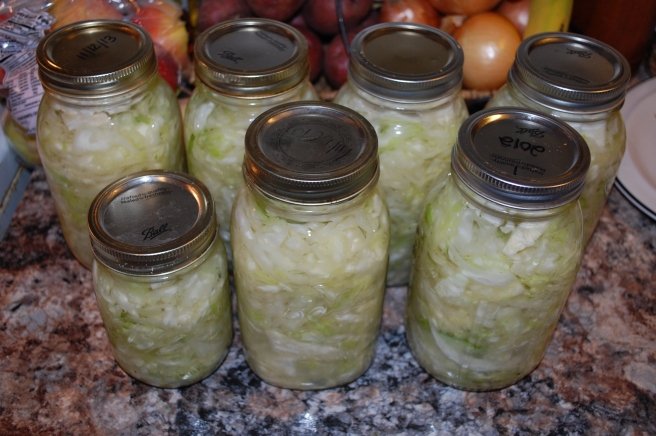
Two heads of mountain cabbage yielded 6 quarts and 1 pint of kraut. Mountain cabbage is bigger than what you tend to find in the grocery store. So if you’re using store-bought cabbage you can still use this recipe. You may not have as many quarts in the end as I did.

Any who..

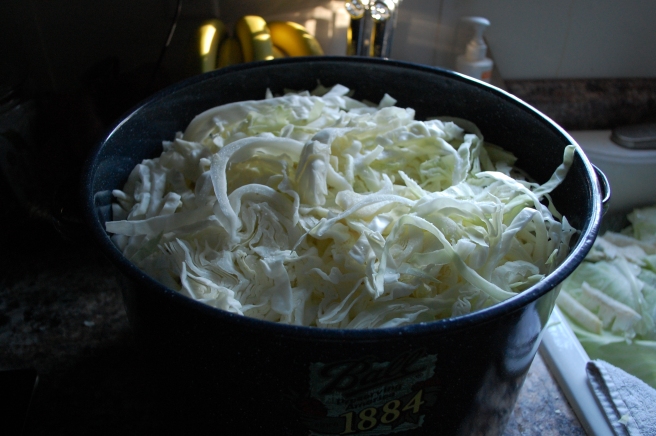
• I first quartered the cabbage and removed the core – setting the core aside for later. I then chopped them as even as possible about 1/4″ in width cutting long ways (I don’t think it matters which direction you chop them).

DSC_0960

• I don’t have a stone crock so I used my water bath canner because that’s all I had that would hold all of the cabbage. I put the first chopped cabbage into the bottom then sprinkled 1.5 Tablespoons sea salt over it. Then I repeated that step with the second head. So it was cabbage, sea salt, cabbage, sea salt. Let it rest for 10 minutes.

DSC_0964

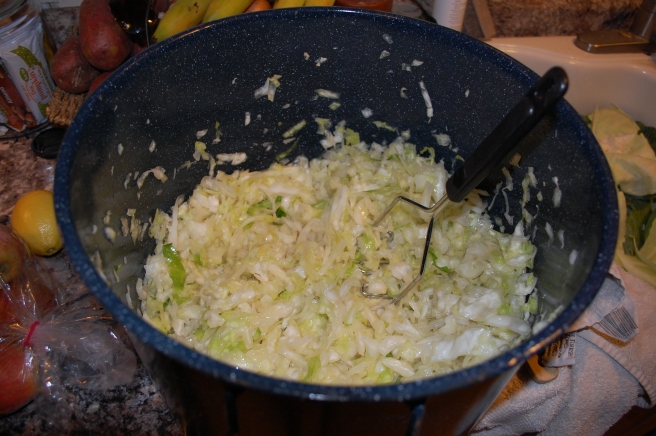
• After it rested for 10 minutes it should have started sweating.. I don’t know that that is the right term but anyways. I started working the cabbage with my hands and potato masher. Any utensil that will help you whack the crap out of it should do. Anger helps so plan to make kraut on a bad day. Lol just kidding. But really…

DSC_0969

• I worked it for about 20 minutes until the cabbage was about half the size it was in the bowl and it was kind of translucent.

• Now you’re ready for your jars. I started transferring my now wet cabbage into their new homes… packing them down after every spoonful.

• Once I had the cabbage in the jars I poured what solution that was left in the bowl over the cabbage. I didn’t have enough to cover all of the cabbage so I made a brine to finish off the rest of the jars. I brought 4 cups of water to a boil and dissolved 1 tablespoon of sea salt. Once it was dissolved I poured it over the cabbage. Then used the end of my spoon to get the air bubbles out. We’re getting close.

DSC_0971

• So we want the cabbage to stay under the brine so remember the core we set aside? Put that on top and push it down submerging the cabbage. Don’t worry if the core isn’t you probably will toss it anyways.

DSC_0970

• Tighten your lids to the jar loosely and set them on a plate or in a pan for they may “juice” which is totally normal. You may want to burp the jars by unscrewing them in a day or so. Let them sit for at least 1 week to ferment then enjoy! The longer they ferment the tangier they will be. After you’re satisfied with the ferment time then scoop off any “scum” and toss the cabbage cores and can if you wish.

DSC_0975

Congrats you made kraut!!

Look what we made for our camper 🙂

DSC_0977

DSC_0980

DSC_0982

DSC_0984

I looove it!!

Happy fermenting and happy camping!

Lucy

DSC_0572

She was tucked away at a school bus garage in Newland, NC. I can’t believe we found this beaut. We knew exactly what we wanted to do to her. We knew what we wanted to do before we found her — all white!

DSC_0990

We carefully brought her home. As soon as we could we started giving her some tlc. Of course there were minor fixes that we needed to do. Replace the running lights, seal the roof, and caulk. Not to mention clean, clean and clean. Then we had our blank white canvas ready for paint.

DSC_0843

20150723_202242

I had the 40-year-old couch and corner cabinet out before Daniel came home the next day. I was pretty proud of myself! By the second day I robbed her of all of her hardware. It wasn’t too long and we had all of the doors off and started priming. I think we ended up putting 3 coats of primer on the wood. I never thought we would see the light at the end of the primer tunnel. Omg. I was so over it. We dressed the walls/ceiling in Cashmere (bought at Sherwin Williams) and the wood in Proclassic (also Sherwin Williams). The Cashmere gave us the softness that we wanted with little sheen and the Proclassic being the durable paint that it is was ideal for our cabinet doors and drawers. #winning

DSC_1000

DSC_0994

We went to Lowes to shop for flooring. We wanted a vinyl plank flooring that would be water-resistant and lightweight. Okay cool. It could be ours for around $600. No thanks.. this is our camper. We found what we wanted and started searching online once we got home. We came across an add on ol’ Craigslist for the same type (different color) for a lot less. We landed 14 boxes of this flooring for $220 which ended up being enough for our camper flooring and us to use in a bathroom in our house.

DSC_0088

DSC_0306

Installing the flooring was a breeze. The weird angles and the last boards gave us a run for our money but we eventually wrangled them into their comfy permanent home. It looked beautiful.  And sitting against that white… ugh it was perfect.

Painting the cabinet doors were Daniel’s job. He manned the sprayer and had them primed and painted in a jiffy. Of course it took several days with all the coats we did but using a sprayer is so much faster than brush painting. (duh)

20150823_130255

We kept the original fixtures. I think they’re lovely. If we had decided to get new ones we would have spent a fortune. Nope these were just fine with me.

I made new curtains for the front quarters. Meh, they’re okay. I’m not the best seamstress but am also my toughest critic. But you know what? They work.

2015-10-15_20.19.51

Goodwill has my heart and I go there first before I ever buy something new. Call me weird. But I landed two sheet sets that were almost the same color and two knit afghans that were perfect for the twin beds. The bedding for the twin beds ran me $18 to be exact. Okay, so they’re not twins exactly. They’re like a cot size. We searched and searched for mattresses online and we were looking at about $170 per mattress. We decided to call around at some local foam factories here and see if they could help us. We were able to get our foam mattresses custom cut to fit the space perfectly. With a perfect price tag, $33 each.

2015-10-15_20.17.42

We wanted a futon for our bed and just so happen my mom needed one gone. Done! Nothing better than free!

Last but not least we painted the inside of our door in chalkboard paint. We thought this would be perfect for our little girl as she grows and gets older. Until then… we will enjoy the heck out of it!!

DSC_0280

After moving everything from our old camper into our new camper Lucy was feeling more like home.

DSC_0574

DSC_0571

After Daniel removed the wheels, inspected them and the brakes, and greased the wheel bearings we were ready to go camping!!

DSC_0587

DSC_0596

DSC_0667

DSC_0825

We have camped in it 3 times so far (getting ready to leave again) and we love it. More than we could have ever loved our 2010 camper. By taking on this project we were able to bond while working on something for our family. We worked our tails off and it wasn’t always rainbows and butterflies (I love that song). It was hard. But we did it!!

Although we have accomplished a lot… we still have a ton of work to do. We are currently working on adding a shelf behind the front bed. Then we will be making counters for the kitchen and bathroom. Our work is far from done. And it may just be me but I like it like that.

Tooterloo

To me homesteading is more than having your own chickens and preserving your gardens treasures for a cold wintry day. For me, it’s much more. When you are able to save money with a talent or even make money with a craft I consider it pulling just another one of you files out of your homesteading drawer.

2015-08-26_11.17.25

A little about me. I’ve been crocheting for about 14 years. And in that time I’ve been trying to master (and still havent) this lost art. I say “lost” because it really is. You don’t see people crocheting/knitting much anymore. And it’s a shame. For years I’ve been making items for friends, birthday presents, Christmas presents and even making some money. Making things for gifts are great. You save money but spill your heart into one of a kind products for your loved ones. I love it. Especially once they open it. That smile. All of those long nights, countless cups of coffee, and the hours you’ve invested in it, that smile, totally makes it worth it. So when it’s time to make a Christmas list I automatically think of what can I make for them??

2015-09-08_16.10.57

I remember posting some of my work on my personal Facebook page and having people tell me I should start a business and that I could sell a lot of my work. Reluctantly, I created Tooterloo. My husband (boyfriend at the time) always called me Tooterloo and still does. I have no idea why. He just did and it kinda stuck and I thought that’d it would be the perfect name for my business.

IMG_20150909_131103

Okay so Tooterloo was established in 2012 and since then I’ve made countless slouchy beanies, infinity scarves, cowls, booties, sweaters etc … I mean I’ve made a lot of stuff for people. After drowning myself in custom orders for years I decided something had to change. I’ve tried a few different platforms and this one seems to work the best for me. Bigcartel. It’s simple, easy to work, affordable and comes without the extra fees.

Tooterloo.bigcartel.com – if you like quality knits then checkout my site!

Starting a business out of something I love and am good at has allowed me to make money for our family.  I don’t care if it’s just enough to buy groceries or to pay mine and my daughters insurance. I was able to put my skill to work to alleviate what would normally come out of our account. Which allows us to save more. Since we decided that I was going to stay at home with our daughter who is now almost 9 months old.. I’ve struggled with not feeling like I am contributing financially. Tooterloo helps with that.

2015-08-25_12.50.43

I said all of that to say this. If you have a talent.. maybe its fiber work or even carpentry.. put it to work. People are supporting the locals and the makers more than ever right now. And if you have something that you’re good at go for it. Make the most out of your homestead. Exalt all avenues where money can be made. And if you’re simply a supporter. I challenge you to support the locals this year. Purchase your gifts from the makers because when you do you’re helping them make a little money for their family.

I hope this post is just a little encouragement to go for it for you that are on the fence about turning your craft into a way you can make money. It’s possible! I did!

My well deserved hiatus

I haven’t made a post in almost a month and I apologize. Things have just been absolutely crazy. While a lot of the craziness is irrelevant,  our garden has been struggling which has fueled some of the craziness.

We ended up dumping manure on our garden and tilling it up. The beans weren’t growing in unison and what beans were coming up were being eaten by bugs. We didn’t have that issue last year. The only difference is that we ran our chicken tractor in between the garden rows with the chickens weed eating and performing full-time pest control duty.

So we started over.

We have also been lacking rainfall. Which doesn’t help matters.

Since we started over, we have nice bean plants coming up, along with corn and spaghetti squash.  We also planted in our potato patch: sweet potatoes, squash, watermelon, pumpkin, onions, and potatoes. We have been full swing!

My brother told me that he planted a few veggies in some old car tires he had. After hearing that and having a very nice neighbor give us some zucchini plants, I used one of Daniel’s old motorcycle tires along with four of his old tires off of his 67 Mustang to make raised beds. They are thriving!

Our chickens are getting big and in fact, I heard a rooster (try to) crow the other day! Poor fella will get the hang of it one day. We have four in our coop in run and 14 in an old dog lot that we move every other day to give them fresh grass.

While I’ve been on a hiatus from blogging we celebrated our 2 year anniversary and headed off to South Carolina and Georgia. We visited some of the coolest beaches I’ve ever seen! Take a looksee!

DSC_0074

DSC_0371

DSC_0340

DSC_0289

DSC_0011

DSC_0385

DSC_0197 DSC_0192

  • Stay tuned, tomorrow I will share my recipe for a super easy non-toxic cleaner that I used on my hardwood floors today! So be on the lookout!

Leave it to cleavers

Normally words come easily over a cup of coffee and around 7 am but today they’re flowing easier than ever. I’ve been growing the prettiest Butterhead and Redina lettuce. I mean they’re beautiful. Well you’ve seen them in previous posts they were just little. They’ve been nurtured and growing great. I go out to the garden yesterday to cut some lettuce for a salad and my lettuce had been ate down to the ground.

Freakin rabbits man. Let’s just say I believe my next post will be about how to utilize a rabbit from meat to pelt. I know I mentioned how destructive they can be in my raspberry post but just a reminder they will tear your garden up. I finally calmed down after I called my husband asking him if we had any rabbit gums because I wanted to catch the little booger. After he said no I decided we are going rabbit hunting… tonight.

DSC_0869

So cleavers… most people’s weed but a homesteaders go to remedy. Growing up my family made tea out of this herb to treat poison oak. We would even use the pulp to put directly on the poison oak. After drinking this tea years ago I haven’t gotten it since. Coincidence? Maybe.. maybe not. Either way I’m a believer.

DSC_0867

I remember my brother and I would examine our socks after our wooded expeditions and we’d have little green fuzz balls stuck to them. This was probably a dead giveaway to my mom that we had been somewhere we shouldn’t have. A thicket of woods and a couple of kids with vast imaginations meant hours of entertainment. For us of course and I’m sure the neighbors.

As you feel the plant it feels sticky, has a square stalk, and is decorated with tiny green seed pods that will cling to almost anything. I’ve found a plant that looks similar but if it doesn’t have a square stalk or sticky it’s not cleavers.

We would pick as much as we could hold in one hand then wash and dry it outside on the porch. After they were dry (it may take a few days) we would make tea out of it. You could speed that process up by putting it on a baking sheet in the oven on low until they’re dry. Be careful not to burn them!

DSC_0879

You can boil it in a pot of water (like you would tea) or put it in the coffee pot (as you would coffee.. filter and all) and fix it that way. If boiled you will need to strain it through a paper towel and strainer. Once boiled/brewed then dilute it with water and have it unsweetened or add honey or sugar and even lemon. It tastes a lot like regular tea just a little more earthy.

After doing some research on cleavers before starting this post I realized that cleavers ability goes further than just treatment for poison oak. From a facial toner to skin rashes cleavers is a versatile herb. Keeping this Spring creeping herb in the medicine cabinet is a no brainer.

You won’t find them in your living room. So get outside and start exploring!

Sign up for my email notifications to not miss a post!

DIY laundry detergent for a YEAR

Being a parent is awesome.

20150418_085218

You think you appreciate your parents before but once you have a child you really really appreciate them and may even make a phone call like, “Mom, I’m so sorry for what I ever put you through!” like I did.

But as I’ve realized the countless restless nights and many wardrobe changes are forgotten when you have one good day of nap time and you can get some chores done. Thankfully, little O is sleeping throughout the night now. She has been since she was about 8 weeks old. I am so lucky to have her.

Where there’s a family there’s laundry… a lot of laundry. I ditched the colorful plastic jugs over a year ago cutting my bill down to around $20 a YEAR for detergent. I could go on about how good it works but all I need to say is my husband is a diesel mechanic and this detergent works great on his clothes. I don’t wash O’s diapers with it yet if you’re wondering but it can be used with he appliances.

DSC_0379

First you’ll need a container with a good sealing lid to put it in. My mom donated a retired kitty litter bin and it works just fine.

Ingredients:

1 container of Oxiclean (3 lb)

1 box of baking soda (64 oz)

1 box Arm & Hammer Super Washing Soda (55 oz)

1 box of Borax (76 oz)

2 bars of Zote (shredded with a cheese grater)

A sandwich bag with holes in it filled with noodles (this absorbs moisture)

Optional: 1 container of Purex Crystals – I added these in my first batch but didn’t on my second.  It’s merely preference.

Mix everything together and there ya go! Use 1 tablespoon per normal size load. I do recommend making this outside because it’s a dusty mess when you pour it in.

It works great for our clothes and especially our wallet and I hope it does for you!

Be sure to follow my blog and sign up for email notifications to not miss a post!